When sewing on a button, there are a couple important aspects that are often overlooked. For one, you always want to leave a bit of space between the fabric and the button to allow the other layer of fabric to lay smoothly between them. Most people who don't know this, sew on buttons really close to the fabric, then when the garment is closed, the fabric doesn't lay right. Secondly, you don't want any large knots on the back of the fabric as this may irritate your skin.
To start sewing on your button, you'll of course need your button, the fabric/garment to sew the button to, a needle, thread (approximately 2 feet (60 cm)), and a small pair of scissors.
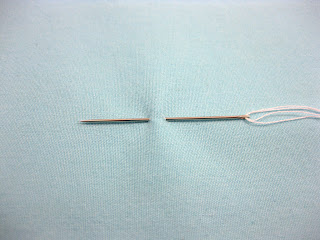
To begin sewing, double over your thread and insert both ends into your needle. If you need help doing so, you can use a super handy little notion called a needle threader, shown in steps 1-3 or you can skip directly to step 5.
Step 1: Insert the wire part of the needle threader into the eye of your needle.
Step 2: Insert your thread (in this case, both thread ends) through the wire of the needle threader.
Step 3: Pull the needle threader out of the needle. This will pull the thread with it.
Step 4: Pull the needle threader off of the thread.
Step 5: Determine where you want to place your button beforehand and grab a small amount of the fabric there with your needle. If replacing a button, you'll probably see two holes in the fabric where the button was, which can then be used as a guide. If sewing on a new button, you may want to sew on the button either parallel or perpendicular to the garment.
Step 6: Pull your needle and thread through, leaving a small loop.
Step 7: Insert your needle into the loop and pull taut, without pinching or distorting the fabric.
Step 8: Take two small stitches in the same place: one perpendicular to the first stitch and one in the same place.
Step 9: Bring your needle up through one hole in your button and down through another. Take a small stitch in the same place as the previous stitch.
Step 10: Bring your needle and thread up through the same hole as before, insert a toothpick or similar object (e.g. a thick needle or pin) into the loop on top of the button, and pull taut.
Step 11: Continue stitching in the same manner, pushing your needle down through the second hole and up through the first. Do this 3-4 times.
Step 12: Bring your needle up through the fabric and to the side, not going through the button.
Step 13: Remove the toothpick and wrap your thread around the threads between the button and fabric approximately three times. Doing this pulls the threads tight and creates the shank, which allows the other layer of fabric to lay smoothly.
Step 14: Insert your needle through the thread shank and pull through, leaving a small loop.
Step 15: Insert your needle through the loop you just created twice.
Step 16: Pull thread tight, creating a knot.
Step 17: Snip your thread close to the knot you just made, leaving a few millimeters to be hidden by the button.
And here's a view of the stitches from the back:
Even though there appear to be a lot of steps to sewing on a button, it really only takes a couple of minutes. And using this method gives you a wonderful, secure result which looks terrific.
Be sure to post your button stories and successes in the comments below and don't forget to share this post - you could be saving someone a lot of money! :)
Happy stitching,
Brian Hinson


Thank you for this! I never knew how!
ReplyDeleteYou're very welcome! Thanks for the comment!! :)
DeleteSeriously amazing tutorial!!!!
ReplyDeleteAw, thanks Toni!! :) I'm just glad people are getting use from it! :D
Delete